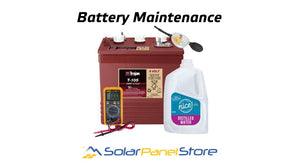
Locally owned and operated in Colorado since 2002--Everything You Need to Go Solar!

Solar Panel Store Blog — Solar Basics

RSS
Deciding on the Best Solar Panel System for your RV

Deciding on the Best Solar Panel System for your RV

RV Solar Panels

Shopping for RV solar systems can be a drag if you don't have the right knowledge on what you will need for your situation. Solar panel mounting tends to be difficult if you've never done it before but we're here to help you along every step of the way.

Steps to deciding on the right solar system for Rv's

1) Decide what kind or RVer you are 

First off, you will need to categorize your RV usage - that is, are you a full-timer? Or are you someone who just gets away for the weekends? If you fall in either of these categories, you'll want to really do the math before investing in a solar panel system. But if you're someone who tends to go away off the grid for extended periods of times but you're not a full-timer, then you should consider one of our solar electric systems. Why is this the most likely scenario where your investment will really pay off? Because the weekend warrior will always have enough battery to get through the weekend. And full-timers will most always find somewhere to doc where power is supplied at the RV park, and you're going to end up paying for that electricity anyway with your park fees. Same goes for marine solar, you need to ask yourself whether you'll have shore power or if you'll be spending extended periods on the water without a generator.

2) Decide how much solar power you will need

Electricity consumption differs from user to user. For example, if you have a larger RV with a microwave, TV, lighting, water pumps and electrical hookups for other devices, you'll need a different RV solar kit than someone who has a smaller RV that needs to run less lighting and perhaps only a water pump. So figure out how much power you'll consume in (example, 4 hours of TV might take 600 watts/hours per day, lighting = 350, refrigerator = 5,000). Then you'll need to know how much storage or battery capacity you'll need on board. From there, you'll be able to back into the numbers and get the proper setup.

An example might be needing to generate 2,000 watts per day so a nice 400 watt system would be the perfect system for someone who needed to power enough to use for that day on into the evening. Of course if you travel when you know you won't have full days of sun and some cloudy days, you'll probably want to increase the capacity for charging. It won't be too long that you'll break even after looking at a gasoline powered generator running to generate that kind of power, not to mention the impact on the environment.

3) Decide on the RV solar system or Marine system you'll need

Based on the few tips above, we'd love to help you decide on exactly what you need. Just give us a call and we'll gather your requirements and help you find the perfect, tailored solution to your portable solar panel needs.

RV Solar Kits

Battery Maintenance

Battery Maintenance

Battery Maintenance

To get the most life and performance out of your solar system's batteries, regular battery maintenance is key.   In this article we cover some basic principles of flooded deep cycle battery maintenance. Please keep in mind all battery systems are different and you should consult your battery data sheet for information specific to your batteries.

Battery Basics.

Voltage.  What is your battery bank voltage? Typical battery voltages include 12V, 24V and 48V, 36V is also found in some instances. Remember that series wiring (positive to negative) will increase voltage while keeping amperage the same. Parallel wiring (positive to positive and negative to negative) will increase amperage, while keeping your voltage the same.

Battery Type. What type of battery are you using? Common battery types include deep-cycle flooded, AGM and gel batteries. Lithium batteries are not yet as common for off-grid applications due to the cost, but they are becoming more popular. AGM, Gel, and Lithium batteries are sealed,  maintenance-free, and more expensive than flooded deep cycle batteries.  Because this article is about battery maintenance, we won’t focus on these other battery types.

Capacity.  Battery capacity for solar systems is measured in amp hours based on a C/20 discharge rate.  The faster a battery is discharged, the less capacity it has.  C/20 is a slower discharge rate that approximates the typical discharge time period of a solar system.  While amp hour capacity can vary by the battery case size, it is common to see 12 volt batteries around 100 amp hours and golf cart style 6 volt batteries around 225 amp hours and L16 size 6 volts around 400 amp hours.  Also if you convert capacity into watt hours you can better estimate how much capacity you need to power the loads you have.  Because Ohm’s law tells us that watts = volts x amps, a 12 volt 100 amp hour battery is 1200 watt hours.  Because the maximum discharge level for deep cycle batteries (“dept of discharge”) is generally 50%, that means that a 1200 watt hour battery only has 600 watt hours of usable capacity.

Tools.  Below is a list of tools you’ll need to do your battery maintenance:

  • Eye protection
  • Gloves
  • Wrench
  • Voltmeter
  • Baking Soda
  • Battery Post Cleaner
  • Distilled Water
  • Hydrometer
  • Vaseline
  • Notepad

Visual Inspection.

The first step is a visual inspection.  But before you do,  ALWAYS be sure to wear eye-protection and gloves when working on a flooded deep cycle battery bank!  And wear old clothes!

A visual inspection includes checking all the batteries. Be sure to look for cracks or irregular bulges. Check for any fluid on or around the batteries. Cracked or leaking batteries will need to be replaced. Also be sure to inspect cable lugs and battery terminals. These should be clean of fluids, dirt and corrosion. Inspect cable connections for tightness.  All connections should be at the proper torque value, which can be found in your battery’s data sheet. Be sure to not over-tighten connections as this can lead to battery damage and hot spots. While connections that are too loose result in poor conduction and hot spots.

Make regular visual inspections of your battery bank a habit. Early problem detection can save a lot of time, money and headaches down the road. Shoot for monthly inspections until you get a good idea of how your batteries perform. Over time you may find that monthly inspections are too frequent, or not enough!  How frequent really depends on how hard they are working.  

Battery Tests.  

After you finish visually inspecting your batteries, there are two important tests you should do as part of regular maintenance:  1) Open Circuit Voltage Testing and 2) Specific Gravity Testing.  Performing these tests each month will provide you with important information about your batteries’ health, age and charge level.  They will also help you detect problems like overcharging, undercharging and overwatering. Finding these issues early is key to keeping the entire battery bank strong.

Specific Gravity.

Testing the specific gravity of a battery’s electrolyte solution with a hydrometer is an accurate way to measure a battery’s “State of Charge”.  As a lead acid battery discharges, sulfuric acid floating in the electrolyte binds back to the charging plates (forming lead sulfate), which makes the electrolyte more water-like and less dense and causes the Specific Gravity to go down.  The reverse is true when the battery charges (Specific Gravity goes up as lead sulfate from the plates changes to sulfuric acid in the electrolyte solution).  Also if your battery’s electrolyte level gets too low, the density goes up and Specific Gravity goes up.

  1. Don’t add water at this time, If your batteries are low on water you should add water and let them go through a complete cycle before testing.
  2. Fill and drain your hydrometer at least 3-4 times before taking your test sample.
  3. Take a sample, you should have enough liquid to completely support the float.
  4. Take a reading and record it. Return the sample to the cell.
  5. Move to the next battery cell and repeat the above 3 steps.
  6. Be sure to check all the battery cells.
  7. Replace all battery caps and clean any liquid that may have spilled in the process.
  8. Correct the readings to 80 degrees fahrenheit by: 
  9. Adding 0.004 for readings 10 degrees fahrenheit below 80 degrees
  10. Subtract 0.004 for readings 10 degrees fahrenheit above 80 degrees
  11. Compare the readings.
  12. Check the state of charge using the below table.

Readings should be at factory specifications of 1.227 +/- 0.007. If any specific gravity is reading low follow the below steps.

  1. Check and record voltage levels.
  2. Put batteries on a complete charge.
  3. Take specific gravity tests again.

If after reading specific gravity you find cells registering low you may try the below steps.

  1. With your voltage meter check voltages again.
  2. Proform an equalization charge.
  3. Take specific gravity tests again.

After your equalization charge has finished and your still getting lower voltage readings than factory specifications you may have one or more of the below conditions:

  1. The battery was left too long in a state of discharge.
  2. The battery was over-watered during the last maintainence procedure.
  3. A weak or bad cell is developing inside the battery.
  4. Electrolyte was spilled or has leaked from the battery.
  5. The battery is reaching the end of its life.

If you are showing signs like those above you may want to take your battery in to a specialist, or consider replacing the battery.

Open Circuit Voltage.

When testing open circuit voltage,  batteries should remain idle with no charging or discharging for 6 hours.  It is best to let them sit idle for 24hrs.

  1. Disconnect all loads from batteries.
  2. Measure voltage using a DC Voltmeter (or a Multimeter set to DC voltage)
  3. Check battery state of charge with the below table.
  4. Charge the battery if it registers 0% to 70%

If your batteries are registering below the table 1 values, the batteries may have been left too long in a state of discharge, or the battery may have a bad cell. In this case it is best to take the battery to a specialist or replace the battery.

Battery Watering.

All flooded batteries use distilled water as a key component of their electrolyte solution.  While not everyone loves checking and adding water to batteries, because flooded batteries are a lot less expensive than sealed batteries, it is worth doing, and doing right.  There are some battery watering products on the market today such as the Trojan Hydrolink, and the BWT system by US Battery that are not within the scope of this article, but make the battery watering process easier and quicker.   

Distilled water should be added after the battery has been fully charged.  However, the water level should at least cover the battery plates before charging. That will ensure that the water levels are sufficient during the different states of charge.  Also, keeping your battery plates covered will keep them from being exposed to air, which can cause corrosion to the plates.

It is also important not to overfill the batteries with water.  Overfilling can result in the battery overflowing and losing battery acid which will degrade the capacity of the battery. Battery acid is a highly corrosive liquid and can cause damage to anything it touches. Battery containment trays can help avoid damage as they provide a safe place to catch any overflowing acid-containing electrolyte. You should use a distilled or deionized water for watering because these liquids have very low mineral counts. Because the battery electrolyte is a mixture of water and battery acid, always wear protective gloves and eye protection when handling or maintaining batteries to protect your skin and eyes from damage.  It’s also best to wear old clothes!

Steps to adding water to a battery:

  1. Put on your protective eye protection and gloves.
  2. Remove vent caps and check the inside fill wells.
  3. If the battery plates are exposed add just enough water to cover these plates.
  4. Put your batteries on a complete charge before adding any additional water.
  5. After your batteries are have finished charging open vent caps and check the fill wells.
  6. Add water until the water level is about ⅛ below the bottom of the fill well.
  7. Clean and replace the vent caps.

You should never add battery acid to a battery.

Below is an example of the Trojan Battery fill wells and where your water level will need to be.

Battery Cleaning.

Regularly cleaning your battery terminals ensures that current will flow through your battery bank smoothly which, in turn, helps make sure all your batteries receive an equal and full charge.

Steps to battery cleaning.

  1. Put on your eye protection and gloves.
  2. Make sure all vent caps are tight.
  3. Clean the battery tp with a cloth or brush with a solution of baking soda and water.
  4. Clean battery terminals and lugs with a post cleaner.
  5. You may want to use a protective coating of anti-corrosive spray or silicon gel.
  6. Clean the area around the batteries this should be a dry organized area.

Keeping a small notebook as your maintenance journal can be helpful to record your maintenance dates and test results so you can compare readings and determine the best maintenance schedule.

Batteries and Solar.

The goal with any battery-based solar system is to maximize the health and life of your battery bank.  Why?  Because the battery bank is often the most expensive component of your system.  So be sure to charge your batteries completely after use. Batteries that are not fully recharged soon suffer from reduced charging capacity and a shorter life span.  If you are going to store the batteries for an extended period of time you will want to charge them fully every three to six months. Flooded batteries can be expected to self-discharge up to 15% each month. This self-discharge rate can depend on the age of the batteries and also the temperature they are stored at.

It is also important that you size your solar array to be large enough that it will fully recharge your battery bank in 4-5 hours during an average sunny day.  That will help your battery bank stay fully charged as often as possible to ensure long battery life.

We hope you found this article helpful.  Following these recommendations should help you keep your deep cycle, flooded batteries healthy and extend their life and your investment for years to come.

Solar Panels 101

Solar Panels 101

Looking for solar panels for sale online?  At SolarPanelStore.com, we have many solar panels for sale!  We sell many sizes, brands and types of solar panels for all kinds of applications.   But you may wonder what a solar panel really is? How are they different?   Which ones would be best for you?

What exactly is a solar panel?  

A solar electric panel is a device that turns energy from the sun into electricity. By contrast a solar thermal panel produces hot water (or other liquid), not electricity. Small pipes arranged in a flat panel configuration comprise a solar thermal panel. The panel is positioned for the sunlight to heat the water or liquid flowing through those pipes.  
Solar electric panels are also known as solar photovoltaic (or PV) panels or “modules.” While “solar module” is really the technically correct term for a single unit comprising several solar PV cells, “solar panel” is the more popular or common term. But whatever we call it, the device makes electricity from sunlight via the “photovoltaic effect” described a bit more below.

 Photovoltaic effect.


The scope of this page is simply to introduce you to some basic concepts about the parts of a solar panel system. In the near future, we'll be blogging about the photovoltaic effect and other solar panel topics in more depth, but for now, just some basics.  Way back in 1839, a French physicist discovered the physical phenomenon called the photovoltaic effect. Basically, when the right material (i.e. silicon) absorbs sufficiently strong enough photons of sunlight, that material's electrons are “excited” and move toward a positive state.  Along the way those electrons can be harnessed to do work (like power a light bulb). Decades of research and development brings us the current state of affordable, commercially useful solar photovoltaics. But stay tuned, as technology continues to improve solar PV efficiency.

Photovoltaic Effect

Differences.  

Solar panels differ most obviously by size, but also by the amount of volts, amps, and watts they produce, the material they are made from, as well as origin, brand, etc. With so many variations in solar panel components, we’ve broken them down into 2 simple categories on SolarPanelStore.com: “Large Solar Panels” and “Small Solar Panels."

Large or Small.

To us, “large” solar panels are those exceeding 200 watts and generally over 24 volts nominally. The building block of the solar panel is the solar cell. And these large panels generally have 60 or 72 solar cells each.  Houses, farms, commercial buildings, big solar gardens and some large RVs and boats use these large solar panels. On the other hand, we think of “small” solar panels as those that are generally 12 volts.  Some are 24 volts.  Generally 36 solar cells or less make up most small panels, generating less than 200 watts.  Small solar panels like these charge 12 volt battery-based electrical systems of all kinds, including those in RVs, boats, remote electrical devices, sensors, radios, pumps, road signs, gates, you name it.

Silicon-based.

Today, silicon makes up most commercially sold rigid solar panels.  Ribbons of fine conductors connect the silicon solar cells that comprise the solar panel.  Tempered glass covers the cells and aluminum frames the panel for strength and mounting ease. But why silicon? Two reasons: silicon is a semi-conductor that is both super available in nature, and its special chemical properties makes silicon ideal to produce electricity via the photovoltaic effect.  Uber-thin silicon wafers sliced from ingots of silicon comprised of a single crystal  (known as mono crystalline or "mono") produce electricity most efficiently.  But attractive pricing for panels made from multi crystalline silicon (known as polycrystalline or "poly") silicon make the slightly-less-efficient poly solar panels a still-popular option.

Thin film.  

“Thin film” solar panels are also commercially available and work well for some specific applications. Several different thin film chemistries exist, but the same concept applies:  a photovoltaic-effect-friendly material is deposited on a substrate or backing material. Different backing material options make for a variety of thin film module applications.  For example, thin film can be produced on a semi-flexible material (using amorphous silicon (aSI)) or on a shingle (also using aSI) or window (using cadmium tulluride (CdTe)).  Also, copper indium gallium diselenide (CIGS) works for all those thin film applications. At the SolarPanelStore, we focus on rigid silicon modules and some semi-flexible thin film modules that work great for adhering to curved RV roofs or sailboat decks.

Brands and Origin.

There are scads of solar PV panel manufacturers these days! While many of the major manufacturers are global companies with plants located around the world, there are regional producers as well. But the biggest origin for panels is China. Some people have a strong preference for a “made in the USA” panel or a strong distaste for panels from China, which often reflect their sentiments across all kinds of goods ranging from cars to guitars.

Quality. 

At the end of the day, people most often want to buy solar panels that will last a long time. And the reality is that China manufacturers can make excellent quality panels. But so can manufacturers in the USA and Italy and Canada for that matter. So at SolarPanelStore, we carry great quality panels from all of those countries! Some brands have higher perceived quality and performance and are priced higher, while other brands focus on solid quality at more affordable price points. Again, because people have different desires, we offer panels in both of those categories. There are sketchy brands out there that may look super cheap, but may also not be UL-listed (important safety standard), have minimal or no warranties (good warranties are 10-25 years), and may not hold up to your local environment (snow and wind load). We've been selling panels for 15 years and while we can supply most major brands, we tend to focus on a group of core, quality panel offerings that will make our customers happy.

Call us. 

If you're looking to buy solar panels online, then we hope this little introduction to solar panels helps you!  See below for solar panel product lines below or click the menu to refine your search.  Please give us a call and we’d be happy to help you buy solar panels that are right for you!
Can I DIY Solar?

Can I DIY Solar?

DIY solar?  Do-it-yourself?  Really?  Let's take a step back first.  You've heard about solar power. And that solar electric (PV) systems save you money.  Solar power is a renewable energy source. It's better for the environment. Good stuff. But expensive right?  First there's the equipment. Then design. Then you need someone to install it all? Whew!


Enter DIY Solar.   Can't you save money and install a solar electric system yourself? Yes you can! Is it for everyone? No it isn't. For example, don't we all know someone who changes their own brakes? Disks, rotors, pads, calipers. What did your last brake job cost you? $1000? Do you think your buddy saved some cash doing the brakes himself? You bet he did. Probably 50% less than an auto dealer break job. But not everyone knows enough, is bold enough, or mechanically-skilled enough to tackle that job. But many could.

The point is, for people with some DIY experience, some mechanical inclination, some drive to learn and courage to try, installing much of a solar electric system is quite do-able. In fact, we estimate more than half of our customers install the majority of their solar systems DIY. While it is pretty common for them to hire a licensed electrician to perform the final wiring connections of their system to the utility grid (and recommended and often required), they often tackle the rest themselves. And like the backyard mechanic  . . . they save a bundle!

System types.  

If you are reading this article, then you've probably learned that there are different types of solar electric (or solar photovoltaic—PV) systems out there. And some are easier to tackle DIY than others. Systems that are less complex and/or smaller are good PV systems to cut your teeth on. For example, many of our DIY house system customers got their feet wet in solar by putting a system in their RV. On the other hand, a basic residential grid-tie system, while not necessarily small, is quite straight forward compared to designing and installing a completely off-grid or hybrid grid-tie/battery-backup system.  Let's compare these different types of solar systems:

Grid-tied systems. With solar's popularity boom in recent years, grid-tied PV systems are the most popular systems,and the most straight forward to design and install. Since these systems simply make DC electricity from the sun and convert it to AC electricity to power your house (and sell excess energy back to the grid), batteries don't enter the picture. And that reduces complexity. No charge controllers, special inverter-chargers, additional shut-offs, sub-panels, etc. Instead, solar panels are simply wired to inverters which are wired to your house's electric panel and a new meter that measures what is sold back to the grid.

Off-grid system. Instead of connecting panels through a smart grid-tie inverter that routes inverted AC electricity where it needs to go (house vs grid), an off-grid system means batteries.  The battery bank is usually larger than you expect (although it does vary depending on the size of the load) and needs to be sized correctly to power the home or loads as desired, while maximizing the life of those expensive batteries. But the DC electricity from the panels needs to first charge those batteries via a DC solar charge controller. DC electricity from the panels (if batteries are full) or from the batteries (if sun isn't shining) then flows though the inverter/charger to feed AC electricity to the house's AC loads. When the sun doesn't shine for 2-3 days, the inverter/charger fires up an attached generator to charge the batteries up. More components, more going on, more to learn.

Hybrid System. In our opinion, this is the toughest, most complex and most expensive system to build. Well, short of an AC-coupled system anyway (beyond the scope of this article!). In this hybrid model, components and considerations of a grid-tied system blend with those of a battery-based system.  Hybrid systems have traditionally been used to add battery-back up to power certain critical loads when the grid goes down.  Instead of using a generator, a battery bank is kept charged and ready by the grid, but then get's refilled by the solar array once the grid fails.  Hybrid systems are increasingly used in situations where the excess power cannot be sold back to the grid (Hawaii) or net metering is prohibited or inhibited by the utility.  In those cases, battery storage is added to a system to power loads at night and essentially only use grid power for backup.  In any event, with the combination of grid and battery components, system-design gets pretty complex and tougher to tackle DIY.

Next steps to DIY Solar.  

Now that you understand the types of systems and some of the complexities involved, let's look at next steps in your DIY Solar journey:

Know your goal.  This is basically the step we covered above.  Understand what you want your system to do.  Do you want to cut your utility bill by 100%? 50%? Look at the last 12 months of utility bills to get a feel for how much energy you want the system to produce.  Are you just looking to power a small system like a remote water pump? Or power a gate?  Knowing your goal is the first step.

Get educated.  Learn, learn, learn!  Subscribe to Home Power Magazine's digital archive service for great articles to help you DIY Solar.  You can find them at www.homepower.com.  Keep checking back here on our site (www.solarpanelstore.com) and our sister site (www.cosolar.com) for a current and growing list of articles and blog posts on all kind of solar topics.   A good forum to read or post questions  on is www.solarpaneltalk.com. Getting informed will help you plan the system for you  and learn what questions to ask when you call an expert

Seek Expertise. You will need help designing your system! There are lots of considerations and nuances for your location and goals. As part of the buying process, at SolarPanelStore.com we regularly help our customers think through the options and help design the right system. Because we don't install systems, we do recommend hiring a local, licensed electrician or solar installer that can help you with final wiring connections or other parts of the project as needed.  Know your limitations and find those folks up front

Permitting/Requirements. Every state and utility (and HOA) is different, so start early to understand what requirements your local utility and AHG (authority having jurisdiction)  have for your system. For example the utility may limit the size of your PV system to a percentage of your historical use.

Incentives. While there are common national programs like the Federal Tax Credit (FTC) and USDA's REAP (Rural Energy for America Program) program, each state and utility have different programs as well. Go to www.dsireusa.org to research what's available to you.

Buying equipment. Buy good equipment from someone who knows what they're doing. We expect reliable, consistent electricity service from the utility, and you'll want the same for your system. We get calls from people buying cheap on Amazon or Home Depot, but then need help but things don't work and they can't get help from those sellers. Since 2002, we at SolarPanelStore.com have worked with our customers all the way through their projects, from concept to maintenance, answering questions, providing advice, pointing to resources and working with manufacturers. And we work hard to be competitive with the bigger guys that don't call you back. You get what you pay for.

Tools. You'll need typical tools used in any home remodeling project, plus some electrical and wiring tools as well. Like an MC4 connection tool, or a Digital Multi Meter to test for voltage and polarity. Again we at SolarPanelStore.com can guide you.

Safety. Obviously solar electric systems involve electricity, which if not handled correctly can cause serious injury or even death. Solar PV systems can involve dangerously high DC current, so taking safety seriously is very important. And lifting large solar panels and mounting them atop poles or roofs involves ladders and risk of falls.  So get familiar with good safety practices described in articles at Home Power.

By no means is DIY Solar a piece of cake.  But with some skill, courage, willingness to learn, and keeping these points in mind, you're well on your way to going solar!